
Your computer doesn’t use up voltage. It runs on a few fixed voltages, mainly 12V, 5V and 3.3V inside the case, and what actually changes with load is the current, which is what turns into watts. So this check splits in two. To see the voltages, install a free monitoring app like HWiNFO and read your motherboard’s sensors, which takes about five minutes. To see how much power the machine is pulling, put a plug-in energy meter between the PC and the wall socket. Here’s how to do both, what the numbers should look like, and what to do when one of them is off.
What voltages your computer runs on
A desktop power supply takes wall power and turns it into several fixed DC voltages, called rails.
The +12V rail does the heavy work. It feeds the processor’s voltage regulator, the graphics card, the fans and any spinning drives. The +5V rail runs USB ports, SATA drives and parts of the board. The +3.3V rail feeds memory, the chipset, M.2 drives and the PCIe slots. There is also a +5V standby rail that stays alive whenever the plug is in, which is how the power button and Wake-on-LAN still work while the PC is off. Older supplies included a -12V rail, which is optional now and barely used.
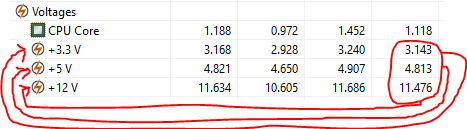
Your processor never sees 12V. The motherboard’s voltage regulator steps it down to somewhere between roughly 0.7V and 1.5V, and it changes that value hundreds of times a second as the load shifts. That reading is called Vcore, or CPU core voltage. Graphics cards do the same thing with their own regulator.
Outside the case, the supply itself takes mains AC. ATX units are built to give full output anywhere from 90 to 135V and 180 to 265V, at 47 to 63 Hz, which is why the same power supply works on 120V and 230V mains.
How to check your PC’s voltages in Windows
The fastest way is HWiNFO, a free monitoring tool that reads your motherboard’s sensor chip directly.
- Download it from the HWiNFO download page and install it. It is free for personal use.
- Launch it, tick Sensors-only, then click Start.
- Scroll past the CPU and GPU blocks to the motherboard section, usually named after the sensor chip (Nuvoton, ITE or similar). That is where +12V, +5V, +3.3V and Vcore live.
- Read the four columns beside each value: current, minimum, maximum and average.
- Leave it running while you push the PC hard for ten or fifteen minutes. A game, a video export or a stress test all work.
An idle desktop tells you almost nothing. Voltage trouble shows up when the graphics card suddenly asks for a few hundred more watts, so the number worth checking is the lowest one recorded under load, not what you see sitting on the desktop.
HWMonitor from CPUID does the same job with a simpler layout, though it supports fewer boards and sometimes labels a rail wrongly.
How to check voltages in the BIOS
Restart and press Delete or F2 as the machine boots, then find the page called Hardware Monitor, PC Health Status, or just Monitor on the newer graphical boards. Most makers list Vcore, +12V, +5V, +3.3V and memory voltage there.
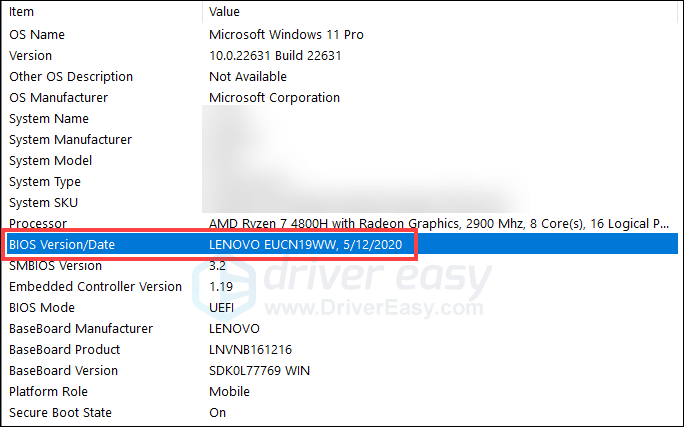
The BIOS reads the same sensor chip that HWiNFO does, so it is not more accurate. What it is good for is a sanity check. If Windows shows 16V on the 12V rail and the BIOS shows 12.1V, the software is misreading the sensor rather than the board having a fault. The catch is that a BIOS reading only ever shows you an idle machine.
What the readings should be
Here is the range each rail is allowed to sit in, taken from the ATX design guide that power supply makers build to.
| Rail | Nominal | Allowed range |
|---|---|---|
| +12V | 12.00 V | 11.20 V to 12.60 V |
| +5V | 5.00 V | 4.75 V to 5.25 V |
| +3.3V | 3.30 V | 3.14 V to 3.47 V |
| +5V standby | 5.00 V | 4.75 V to 5.25 V |
| -12V (optional) | -12.00 V | -10.80 V to -13.20 V |
The 12V rail used to be held to plus or minus 5 percent. The current version widened the low end to minus 7 percent so supplies can ride out the short, sharp power spikes that modern graphics cards produce, and some units now aim at 12.1V or 12.2V rather than 12.0V to leave headroom. A steady 12.15V is healthy.
Vcore has no equivalent table. It depends on your chip, your board settings and what the processor is doing at that instant, so watching it swing between 0.7V at idle and 1.4V during a short burst is expected, not a fault.
How much power your PC is drawing
For watts, use a plug-in energy meter. It sits between the wall socket and the PC’s power cable and shows the real draw in watts, along with volts, amps and frequency. The Kill A Watt P4400 is the common one on 115V mains, rated for 0.2 percent accuracy and up to 15 amps, and the same style of meter is sold for 230V sockets.
Take three readings: idle at the desktop, full load in a game, and asleep. Those three numbers cover almost every reason you would want to know, from sizing a UPS to working out what the machine costs you each month.
Wall watts are always higher than what your parts actually use, because the supply wastes some as heat. An 80 Plus Gold unit on 115V has to reach 90 percent efficiency at half load, so a system using 400W of DC power pulls roughly 445W from the socket.
Two shortcuts if you would rather not buy a meter. Some power supplies report their own output: Corsair’s RMi, HXi and AXi models connect to a USB header on the board and show per-rail voltage, current and wattage in iCUE. Failing that, HWiNFO lists CPU Package Power and GPU power in watts, and adding those two plus roughly 50 to 80W for the board, drives, fans and memory gets you an estimate. It is not a measurement.
Task Manager has a Power usage column, but it ranks apps from Very low to Very high based on processor, graphics and disk activity. It never gives you watts.
How to check voltage on a laptop
Laptops do not expose 12V and 5V rails the way desktops do, but Windows will tell you what the battery is doing. Open PowerShell and run this:
Get-CimInstance -Namespace root\wmi -ClassName BatteryStatus
Voltage comes back in millivolts, so 11800 means 11.8V. DischargeRate comes back in milliwatts, so 14500 means the machine is drawing 14.5W from the battery at that moment. Run it while unplugged, because the discharge rate reads zero when the charger is connected.
For the design figure, Get-CimInstance Win32_Battery gives a DesignVoltage property, again in millivolts, which is the voltage the pack was built around.
The other number worth knowing is printed on your charger. A brick marked 20V and 3.25A is a 65W charger, and that is the ceiling for what the laptop can pull from the wall while it charges.
When software readings cannot be trusted
Software does not measure your power supply. It reads a small sensor chip on the motherboard, and that chip needs a scaling factor for each rail that differs from board to board. Get the factor wrong and the 12V rail turns up as 2.04V, or 16V, or disappears from the list. Bad readings are far more common than bad power supplies.
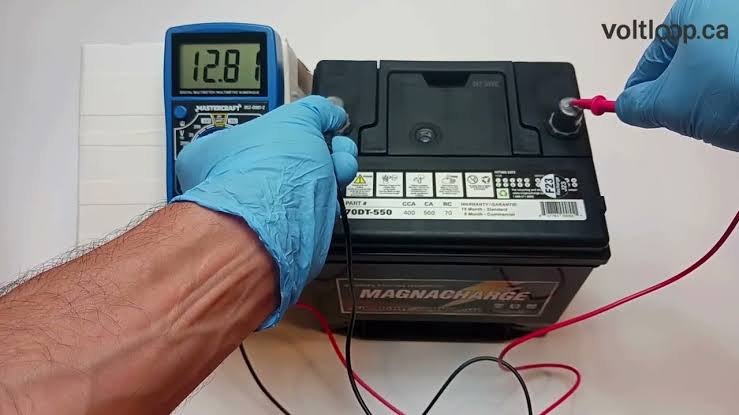
A multimeter settles it. With the side panel off and the PC running:
- Set the meter to DC volts, 20V range.
- Put the black probe on bare metal in the case or on a black wire in the 24-pin connector.
- Slide the red probe down the back of a yellow wire (+12V), a red wire (+5V) or an orange wire (+3.3V) at the 24-pin, alongside the pin, without unplugging anything.
- Read it at idle, then again under load.
Two safety rules go with this. Never open the power supply case, because the capacitors inside hold a dangerous charge long after it is unplugged. And keep the probe tip steady, since slipping across two pins shorts them together and can kill the board.
What to do if a voltage looks wrong
Work through it in order, cheapest step first.
Confirm the reading somewhere else. Check the BIOS, then a second app, then a multimeter. Most alarming readings die at this step.
If it is real, check the cables. Reseat the 24-pin plug and the CPU and PCIe connectors. Never reuse modular cables from a different power supply, even from the same brand, because pinouts change between models and a mismatch can put 12V where 5V belongs.
If a rail is still outside its range under load, or the value wobbles by more than a couple of tenths, the supply is on its way out and should be replaced. Rail voltages that flicker are one of the earliest warnings.
Vcore is a separate matter. If it changed recently, look at what changed in the BIOS: a memory profile like XMP or EXPO, an undervolt, a power limit, or a settings reset after a firmware update.
Frequently asked questions
Does my computer use 110V or 220V?
Whatever your wall socket supplies. Nearly every modern ATX power supply is auto-ranging and gives full output anywhere from 90V to 265V, so the same PC runs on both. The label on the side of the supply confirms its range.
Can I check my PC’s voltage without installing anything?
Yes. Restart into the BIOS and open the Hardware Monitor or PC Health page, which lists Vcore and the main rails. The limitation is that it only ever shows an idle machine, so it will not catch a rail that sags under load.
Is 11.8V on the 12V rail a problem?
No. The allowed range goes down to 11.20V, so 11.8V sits comfortably inside it. Worry when a rail leaves its range under load, or when the reading jumps around instead of holding steady.
How many watts does a typical desktop use?
It depends entirely on the parts, which is why measuring beats guessing. Put a plug-in energy meter on it and take three readings: idle, full load, and asleep. Those cover almost every reason to ask.
Why does my CPU voltage keep changing?
Because it is designed to. The processor asks for a different voltage many times a second depending on load and clock speed, so movement between roughly 0.7V and 1.4V is normal. A value frozen at one number usually means a manual override in the BIOS.
Conclusion
Install HWiNFO, run it in Sensors-only mode, and watch the minimum and maximum for +12V, +5V and +3.3V while the PC works hard. If all three stay inside the ranges above, the power supply is doing its job. If what you really wanted was watts rather than volts, a plug-in energy meter at the wall gives you the true figure in seconds. And when a reading looks alarming, check it against the BIOS before you spend any money.
Related Post:
AMD Audio Drivers: What They Are and How to Install Them
RPCS3 CPU Tier List: Which Processor You Need for Smooth PS3 Emulation
Why Is My CPU Clock Speed So High? What It Means and When to Worry